Custom Menu
Setting up your custom menu is very simple and uses a straight forward syntax that anyone can use. Read more at Moodle Custom Menu.
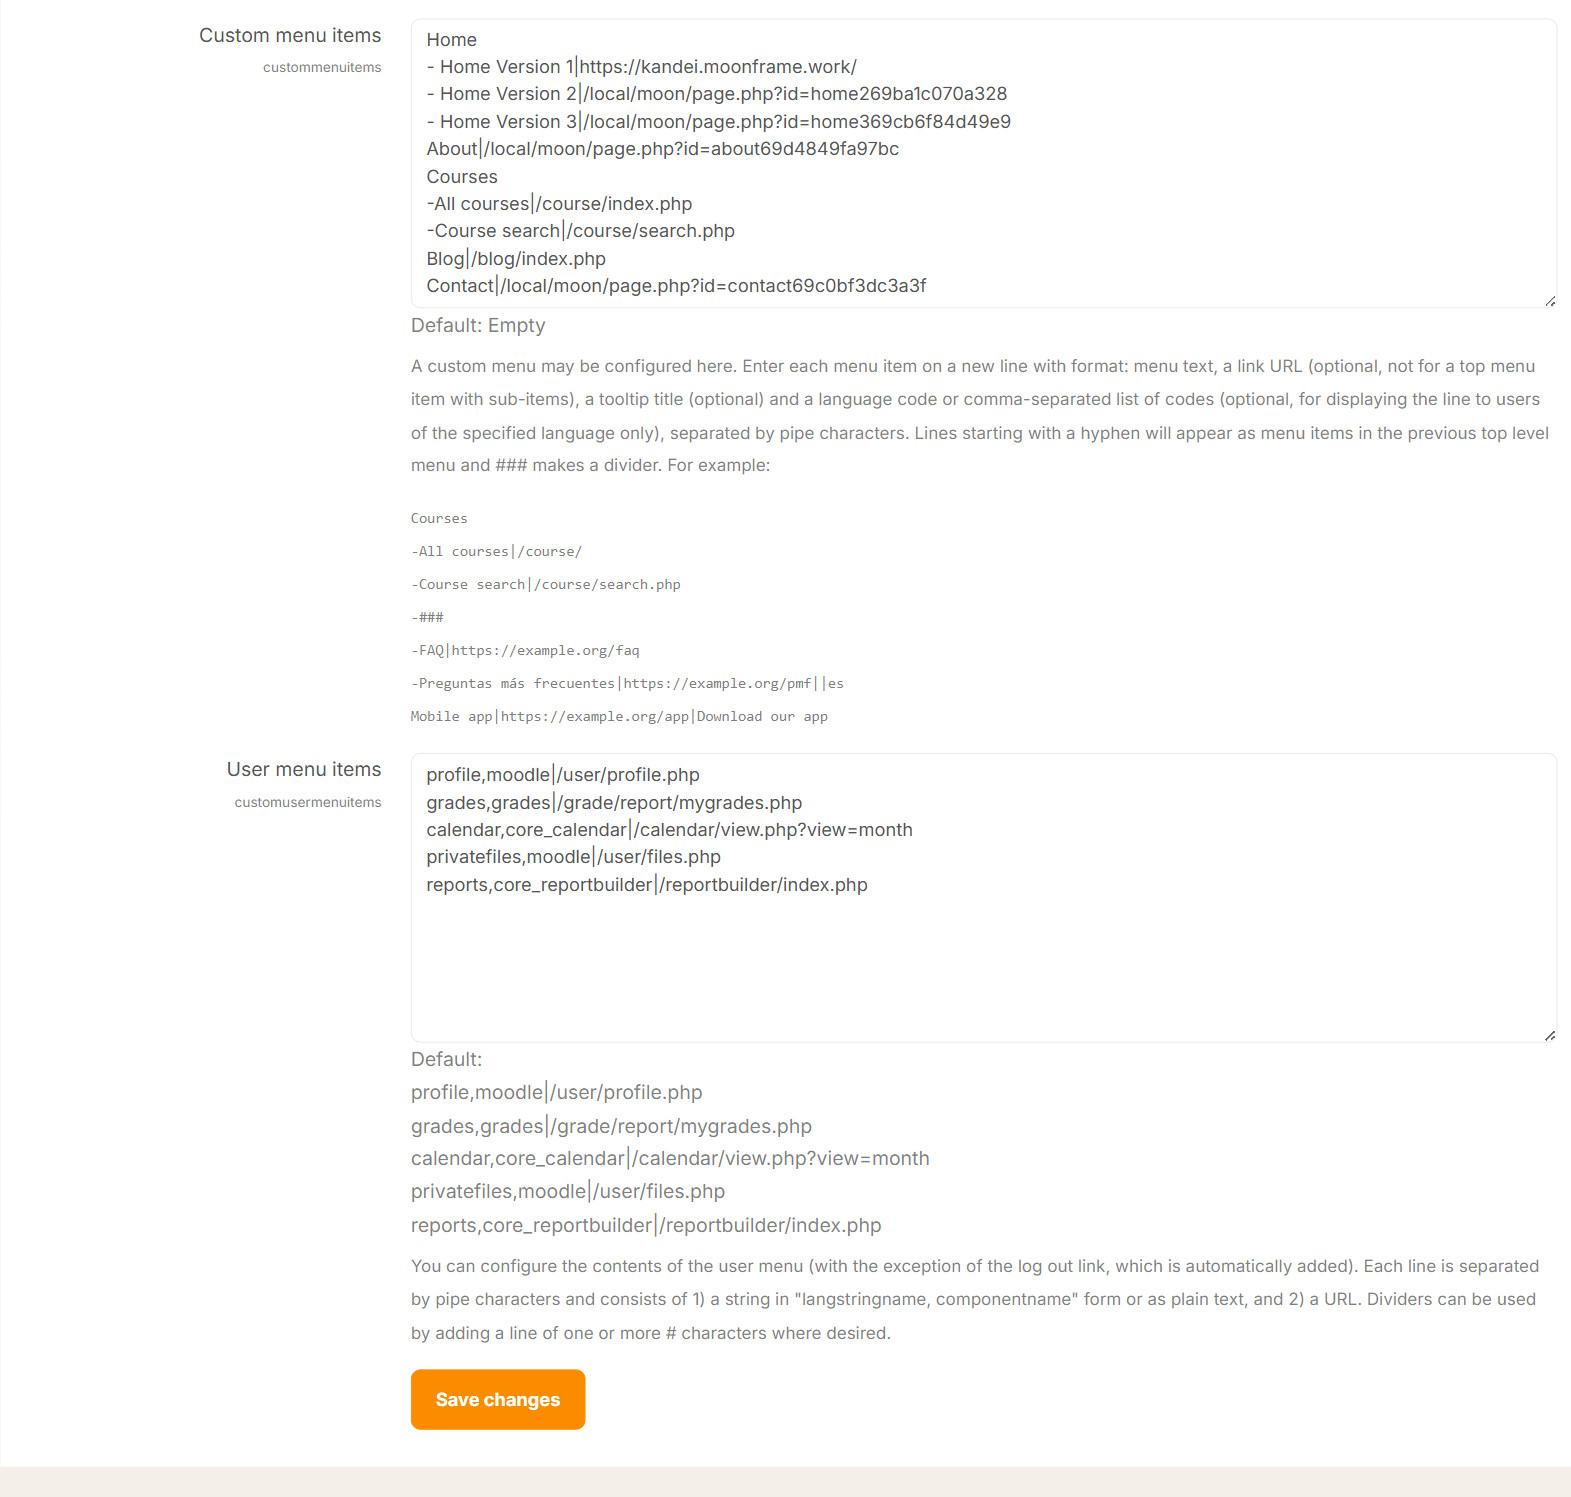
📘 How to Add a Custom Menu in your Moodle
Step 1: Go to Theme Settings
- Log in as an Administrator
- Navigate to: Site administration → Appearance → Advanced Theme settings
- Find the Custom menu items field
Step 2: Add Menu Items
Essentially, every menu item consists of 2 parts: the menu title as text (which is what users will see) a vertical bar and then the link url. The vertical bar or pipe is used whenever the menu item will be linked. For sub-menu items (those that show when you click or hover over the menu titles) you can add a prefix of one dash or two dashes depending on the hierarchy.
Enter each menu item on a new line using this format:
Menu text | URL
Example:
Home | /
Courses | /course/index.php
Contact | /contact
Step 3: Create Dropdown Menus
To create a submenu, use a hyphen (-) before items:
Courses
- All courses | /course/index.php
- Search courses | /course/search.php
👉 “Courses” becomes a parent menu with dropdown items.
Step 4: Add Divider (Optional)
Use ### to insert a separator:
Resources
- Docs | /docs
- ###
- Support | /support
Step 5: Multi-language Menu (Optional)
Home | / | en
Trang chủ | / | vi
⚠️ Tips
- No spaces around
| - Use relative URLs (e.g.
/course/index.php) - Make sure your theme supports custom menus
- Use
-correctly for dropdowns