Theme Footer
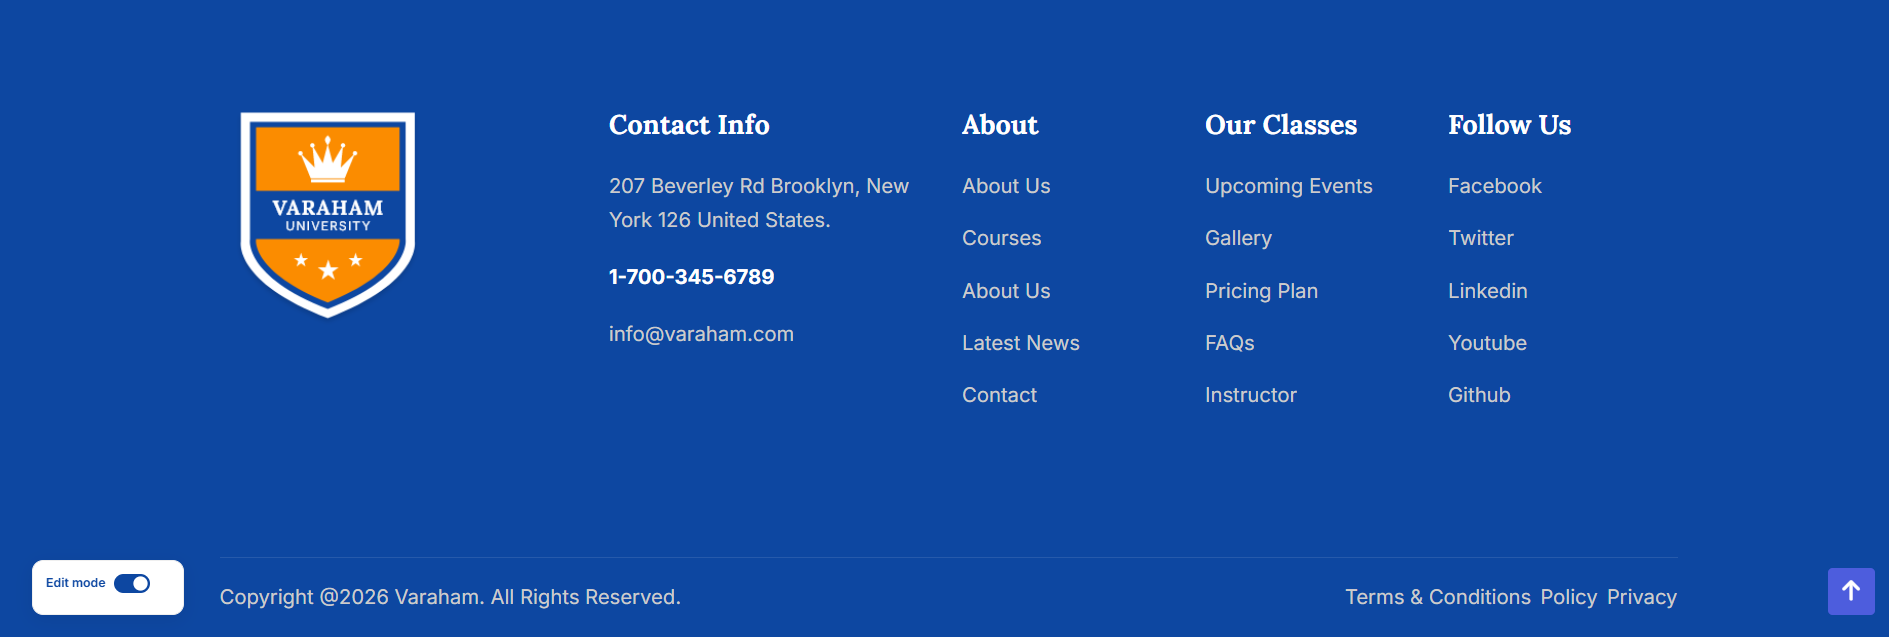
The theme footer is created using a Sub-Layout. This sub-layout is then inserted into the Main Layout, allowing you to reuse and manage the footer content easily. Please go to Site Administrator > Appearance > Themes > Edit the Varaham theme's settings > Layout > Sub-Layout.
You can:
- Edit footer content (text, links, images, phone number)
- Adjust column widths
- Add or remove footer sections
- Control how the footer appears on desktop, tablet, and mobile
Understanding the Footer Structure
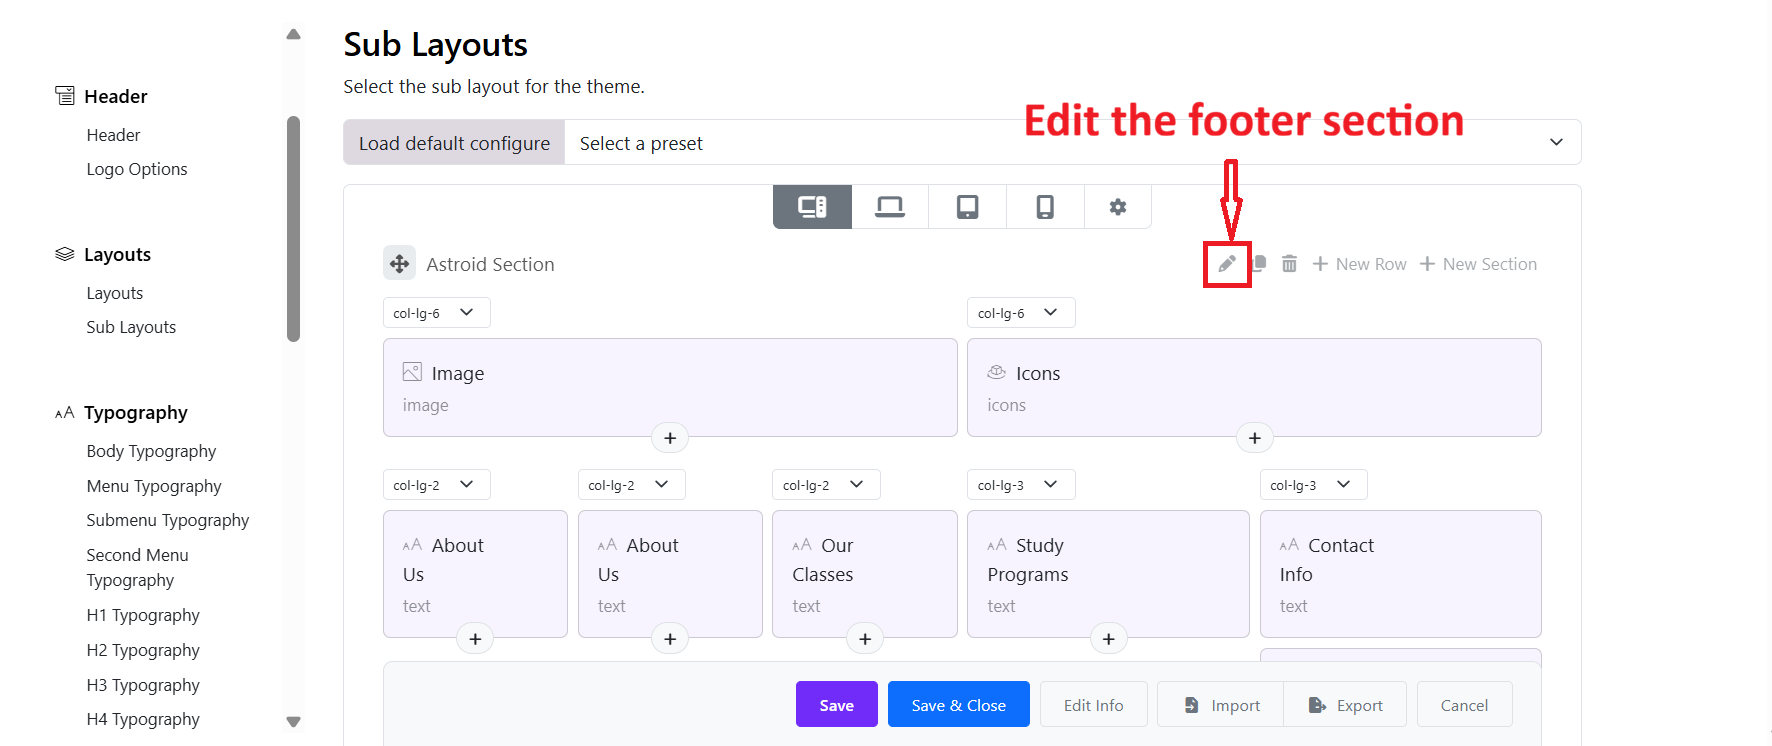
Sections
The footer is divided into sections (labeled as Astroid Section).
Each section can contain:
- One or more rows
- Multiple content blocks (text, image, links, etc.)
Rows and Columns
Inside each section:
- Content is arranged in columns
- Column width is controlled by dropdowns like
col-lg-2,col-lg-4,col-lg-6
Example:
col-lg-2= small columncol-lg-4= medium columncol-lg-6= half width
👉 Column sizes affect desktop view. Tablet and mobile views auto-adjust.
Footer Content Blocks
Each box inside a column is a content block.
Common footer blocks include:
- About Us – Text description
- Our Classes – Quick Links
- Text – Quick Links
- Follow Us - Social Icons
- Contact Info – Contact Address
- Image – Logo or footer image
- List - Menu Links
Editing Footer Content
- Click on a content block (e.g. About Us)
- Update the text, image, or links
- Click Save when finished
Changes apply instantly after saving.
Adding New Content
Add a new content block
- Click the ➕ (Plus) icon inside a column
- Choose the content type (Text, Image, Links, etc.)
Add a new row
- Click + New Row
Add a new section
- Click + New Section
6. Device Preview
At the top of the editor, you can switch between:
- 🖥 Desktop
- 💻 Laptop
- 📱 Tablet
- 📱 Mobile
Use these to ensure the footer looks good on all devices.
Footer background
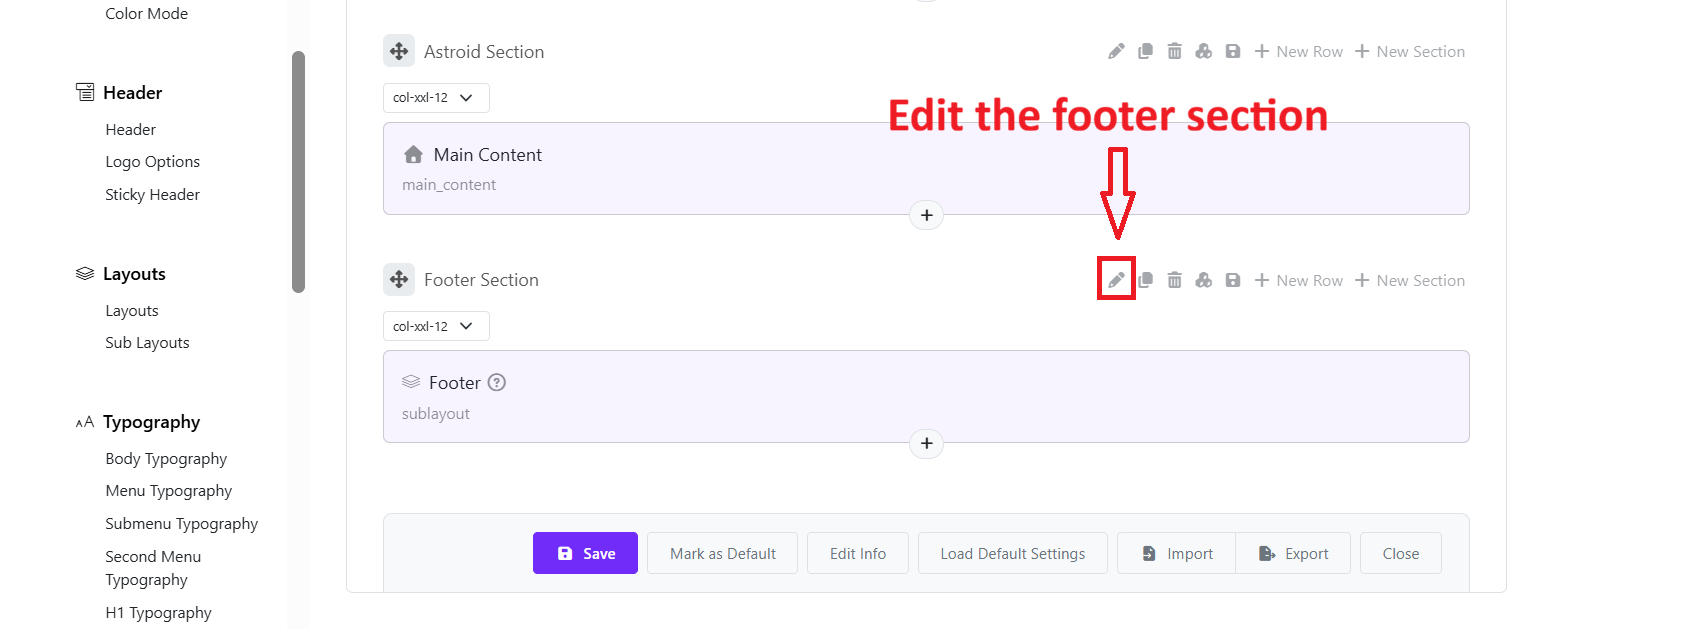
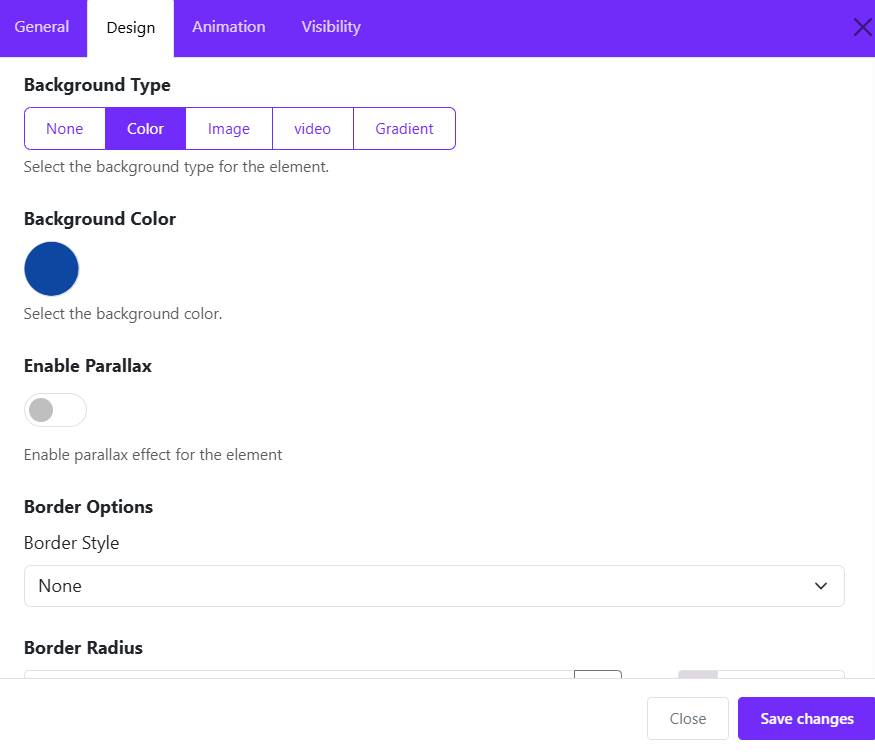
- Go back to Layouts > edit the Footer Section > Design tab. You can see background options: Color, Image, Video, and Gradient.
- If you don't want to set a background type, choose None.
How the Footer Appears on the Website
- The footer sub-layout is linked to the main layout. You just need to edit the Main Layout > add the sub-layout to the footer section > Save.
- Any changes you make in the sub-layout will be automatically updated in the website footer.
- No additional setup is required.